Install Exterior Fake CCTV: A Step-by-Step Guide Using Blinking Lights
Dummy cameras with blinking lights offer an affordable and easy-to-install security solution for hom…….
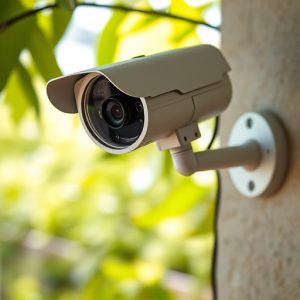
Dummy cameras with blinking lights offer an affordable and easy-to-install security solution for homes and businesses, deterring crime through realistic lighting effects. Before installing, meticulously prepare your outdoor space by clearing obstructions, ensuring a stable mounting structure, removing shadows, and checking for nearby power sources. The installation process involves strategically placing the camera and lights, testing power sources, and performing final checks from a distance. Proper placement enhances security while maintaining the realism of the dummy camera setup.
Deterring crime and enhancing security has never been easier with dummy cameras, especially those featuring blinking lights. This article delves into the world of exterior fake CCTV mounting, offering a comprehensive guide for property owners seeking an affordable and effective security solution. From understanding the benefits of dummy cameras to preparing your space and a detailed step-by-step installation process, we provide all the information needed to deploy these realistic-looking devices effectively.
- Understanding Dummy Cameras and Their Benefits
- Preparing Your Exterior Space for Mounting
- Step-by-Step Guide to Installing Fake CCTV with Blinking Lights
Understanding Dummy Cameras and Their Benefits
Dummy cameras, also known as fake CCTV cameras with blinking lights, are an effective deterrent for crime and offer numerous advantages for home and business security. Unlike traditional CCTV systems that require complex installation processes and expensive equipment, dummy cameras are easy to set up and maintain. They provide a visible warning to potential intruders, often deterring them before they even attempt to enter the premises.
One of the key benefits is their versatility; these cameras can be strategically placed in various outdoor locations, from front entrances to backyards, giving the appearance of a fully functional surveillance system. The blinking lights mimic the active nature of real CCTV, making it challenging for vandals or thieves to identify if they are real or not. This simple yet powerful tool can significantly enhance security without breaking the bank, making it an attractive option for those seeking cost-effective solutions.
Preparing Your Exterior Space for Mounting
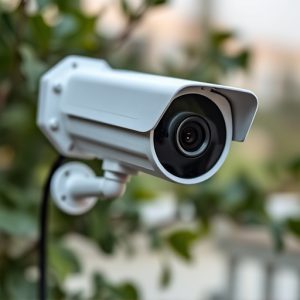
Before mounting your exterior dummy cameras with blinking lights, it’s crucial to prepare your space thoroughly. Begin by assessing the location where you plan to install the cameras. Clear any obstructions like trees or plants that might interfere with the camera’s field of view. Ensure the area has a stable structure suitable for mounting, such as a wall or fence. It’s also important to consider accessibility; you should be able to easily reach the mounted cameras for maintenance and adjustments.
Remove any existing fixtures or decorations that could shadow the camera or obstruct its vision. Clean the surface where the cameras will be attached to ensure optimal adhesion. If mounting on a wall, check if there are any power sources nearby for connecting the dummy cameras. This preparation stage is essential to guarantee your CCTV system offers maximum visibility and protection for your exterior spaces.
Step-by-Step Guide to Installing Fake CCTV with Blinking Lights
Installing a dummy camera with blinking lights can be a simple and effective way to enhance home or business security while deterring potential intruders. Here’s a step-by-step guide to ensure your fake CCTV setup is both secure and realistic:
1. Select the Ideal Location: Choose a spot that offers a clear view of the area you want to monitor, such as entrances, exits, or areas with valuable assets. Ensure it’s accessible for mounting the camera.
2. Prepare the Mounting Surface: Clean the surface where you’ll attach the dummy camera. Use appropriate tools to ensure the area is free from debris and dust. For outdoor installations, consider weatherproofing the mount to protect against harsh elements.
3. Attach the Camera Body: Securely fasten the dummy camera onto the mounting hardware using screws or adhesive provided with your kit. Ensure the camera is level and aligned correctly for optimal visual impact.
4. Connect the Blinking Lights: Plug in the lights and verify their functionality. These lights should mimic real CCTV cameras by periodically blinking, adding to the realism of your setup. Adjust brightness levels if needed for maximum effect.
5. Test the Power Source: Ensure the camera’s power supply is functioning correctly. Test the connection between the camera and its power source to prevent any unexpected shutdowns or malfunctions.
6. Final Touches and Testing: Once the camera and lights are secured, test the entire system from a distance using your phone or control panel (if applicable). Verify the camera’s field of view and ensure the blinking lights are visible but not distracting.
Installing exterior fake CCTV, equipped with blinking lights, offers a cost-effective and efficient way to enhance home security. By understanding the benefits of dummy cameras and meticulously preparing your outdoor space, you can successfully mount these devices, creating an intimidating presence for potential intruders. The step-by-step guide provided ensures a seamless installation process, allowing you to take control of your property’s safety with minimal effort.